Instructions: How do I scan tickets with the Entry app?
Overview:
1. register as organiser or admission manager
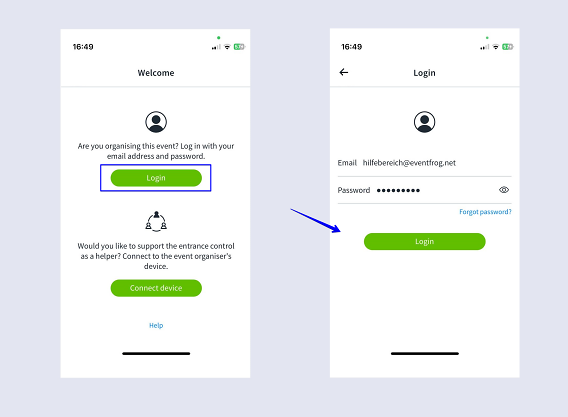
To log in with your Eventfrog account, open the app and click on "Log in".
Enter your email address and password and confirm with "Log in".
2. Select event
To select an event, click on "Select event" at the bottom of the main menu or go to "Select event" via Settings
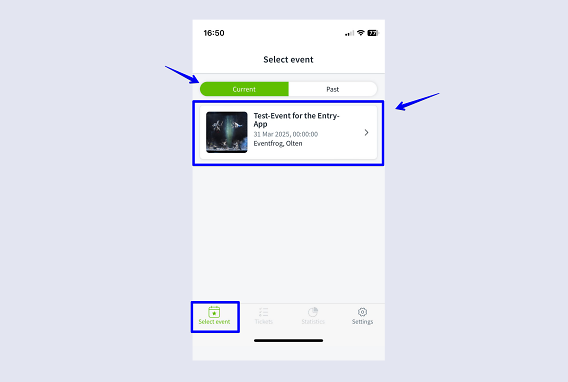
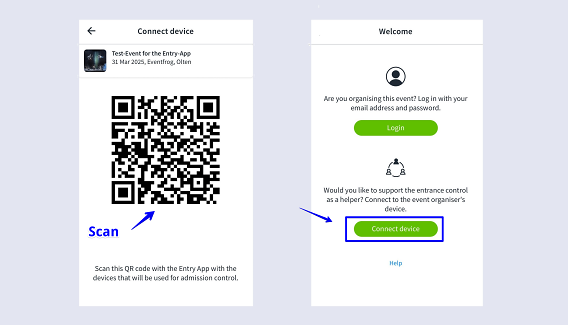
To pair the devices of helpers who do not have their own account, first select the current event.
Then click on the cogwheel (settings) at the bottom right.
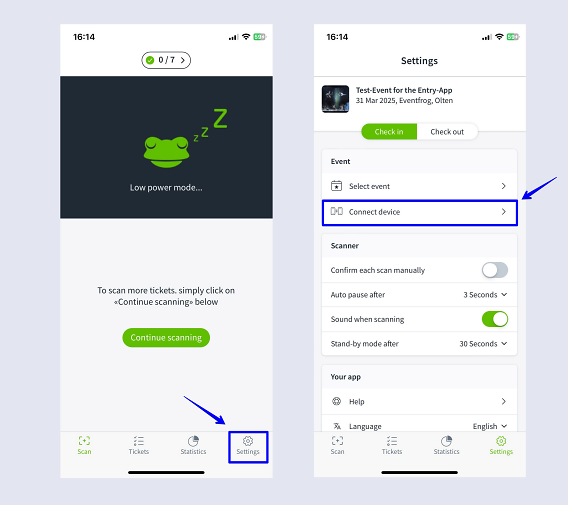
You will be shown a QR code that the helpers can scan with their smartphone camera. They do not need their own account, but must already have the app installed. Scanning the code starts the app and you can click on "Connect device".
3. Read tickets
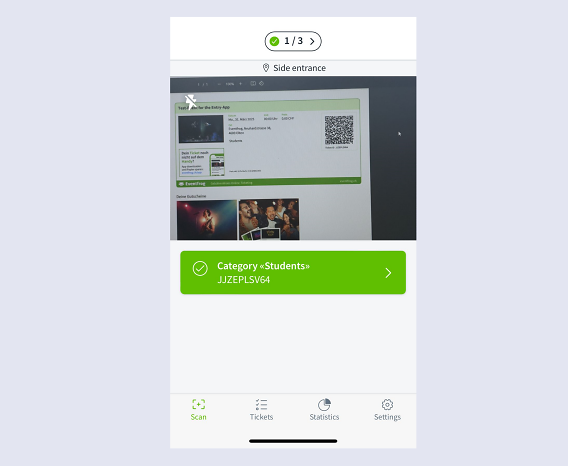
Once all devices are logged in and paired, scanning can begin. To do this, hold the scanner over the QR code on the ticket.
Green:
- In check-in mode: The scanned ticket is valid.
- In check-out mode: The ticket has been checked out.
Orange:
- The ticket must still be paid for (if "pay on site" was offered).
- The ticket was purchased with a subcategory for which it may be necessary to check on site whether the ticket purchaser is authorised to purchase this subcategory (e.g. students, children under 16, etc.).
Red:
- The ticket is invalid
- Incorrect checkpoint (if checkpoints exist)
- The ticket has already been checked in (duplicate)
- The ticket has not yet been checked in or has already been checked out (in check-out mode)
4. Ein- und Auscheck-Modus
Bereits eingecheckte Tickets können beispielsweise in der Pause auch wieder ausgecheckt werden, damit diese beim erneuten Passieren der Einlasskontrolle, noch einmal eingelesen werden können.
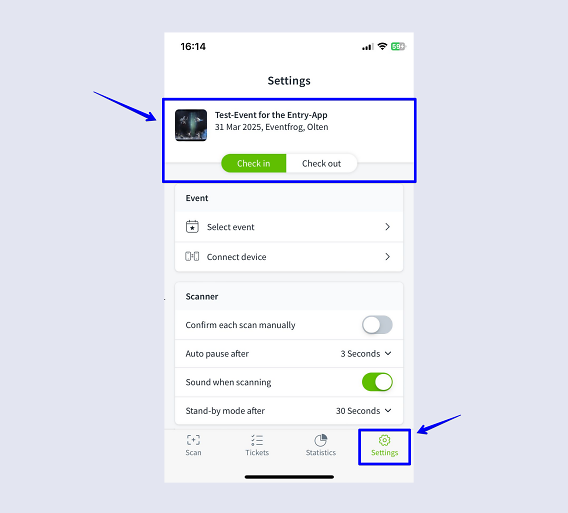
Gehe dafür auf «Einstellungen» und dann siehst du beim gewählten Event oben, die Einstellungen «Einchecken» und «Auschecken». Der aktive Modus ist immer grün hinterlegt.
Wechsel auf Wunsche den Modus zu «Auschecken». Bestätige die folgende Meldung.
Um wieder zum Eincheck-Modus zu wechseln, befolge dieselben Schritte, einfach mit «Einchecken».
5. Tickets manuell ein- oder auschecken
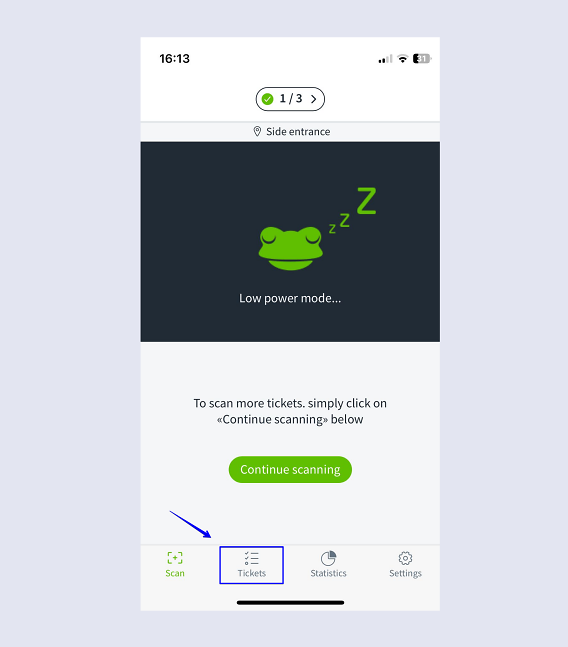
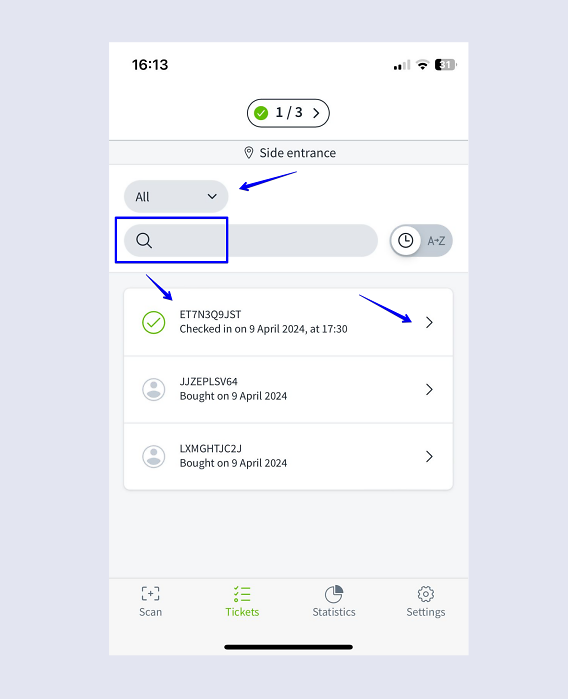
Wenn insbesondere ein ausgedrucktes Ticket in Mitleidenschaft gezogen wurde und der QR-Code deshalb nicht lesbar ist, kannst du das Ticket auch manuell einchecken. Tippe dazu unten im Screen auf das Listen-Symbol.
Then search for the ticket ID (located below the QR code) and click on the arrow to call up the details of the ticket.
You can also filter the ticket list by "All", "Checked in" and "Still open". You can also customise the sorting.
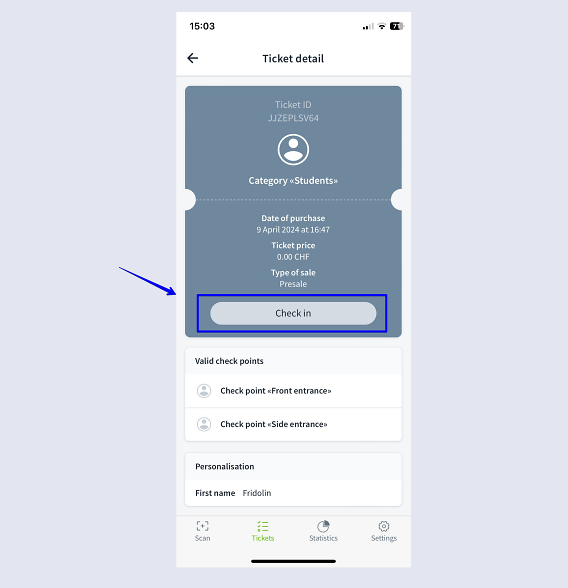
Now check in the ticket manually by clicking on "Check in".
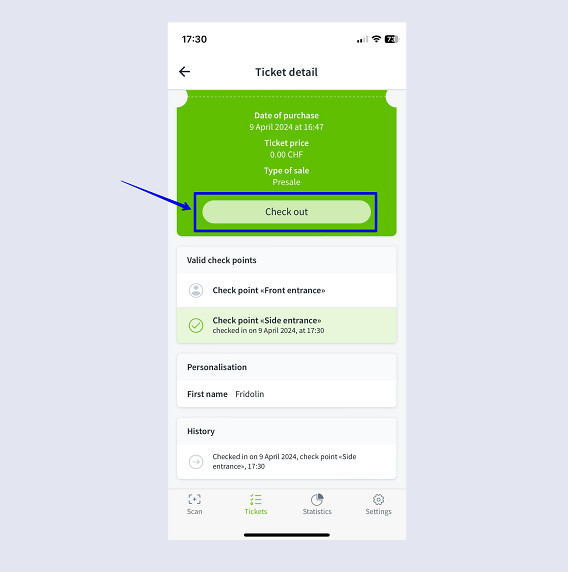
To check out a ticket manually, click on "Check out" for the checked-in ticket.
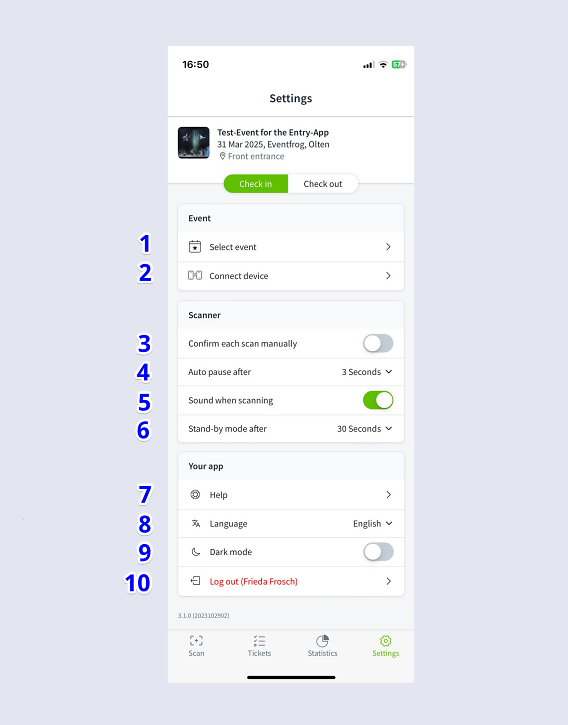
6. All settings at a glance
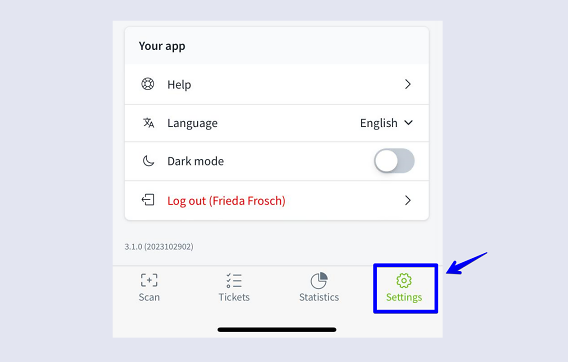
You also have various additional setting options in the app. To access the settings, click on the cogwheel at the bottom right.
1. under "Select event", select the event for which you would like to scan tickets.
2. under "Connect devices" you can pair smartphones for admission control.
3. here you can set that the scan of each ticket must be confirmed individually
4. set under "Auto pause" whether there is one and how long it should last
5. use the quack sound during scanning to mark each scan with an acoustic signal
6. set when the smartphones switch to scanner standby, e.g. to save battery.
7. under "Help" you can access the help area and the articles about the Entry app.
8. switch between German, English and French.
9. activate the dark design (dark mode) if you wish.
10. you can log out here and see which account you are logged in with.
