Protect categories using an access key
Overview:
Overview: What is an access key?
An access key allows you to make specific ticket categories available only to selected individuals – for example, VIPs, members, or patrons. These protected categories are only visible once a valid access key has been entered.
Note: This feature is available in the Plus and Pro plans. Access keys can only be created and managed by organisers under the «Codes menu.
Creating categories with an access key
- Set up an event with ticket sales.
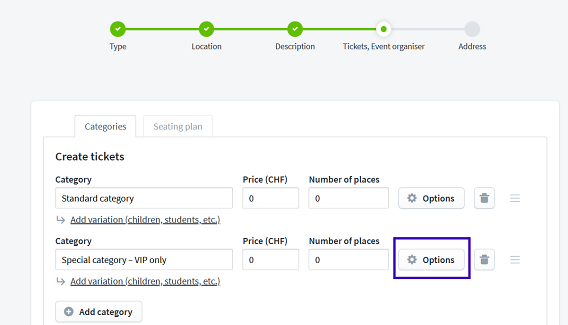
- Create a ticket category – define the price and quantity.
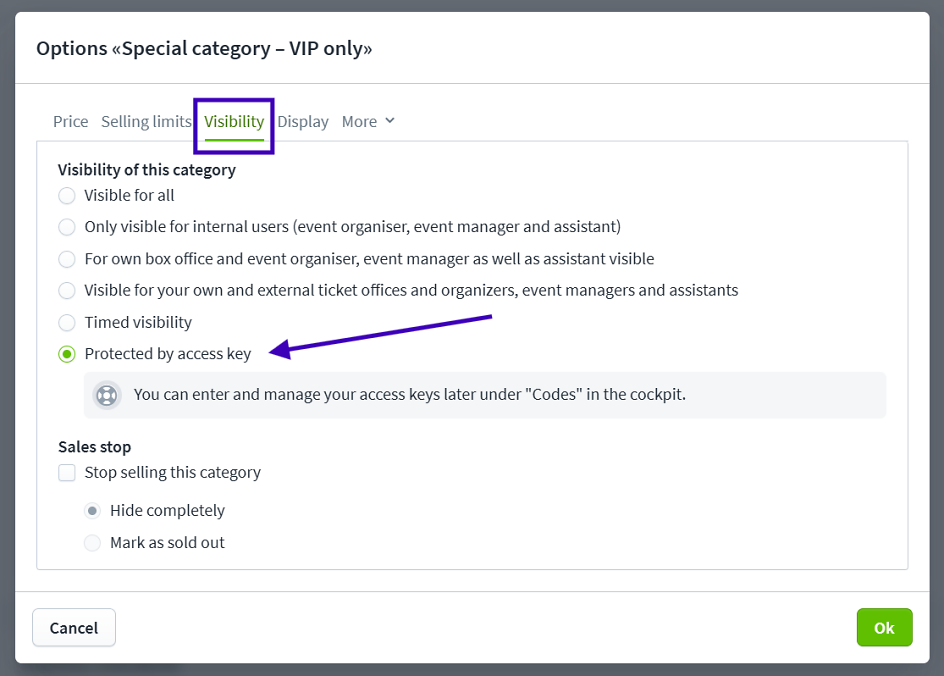
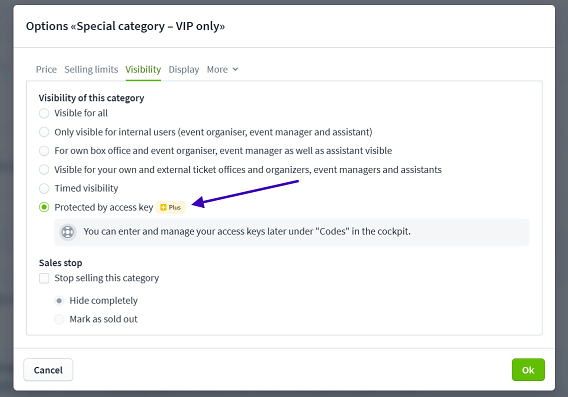
- Under «Options» → «Visibility», select «Protected by access key».
- Save
Afterwards you can create the actual access keys in the «Codes» section.
Using access keys for events with a seating plan
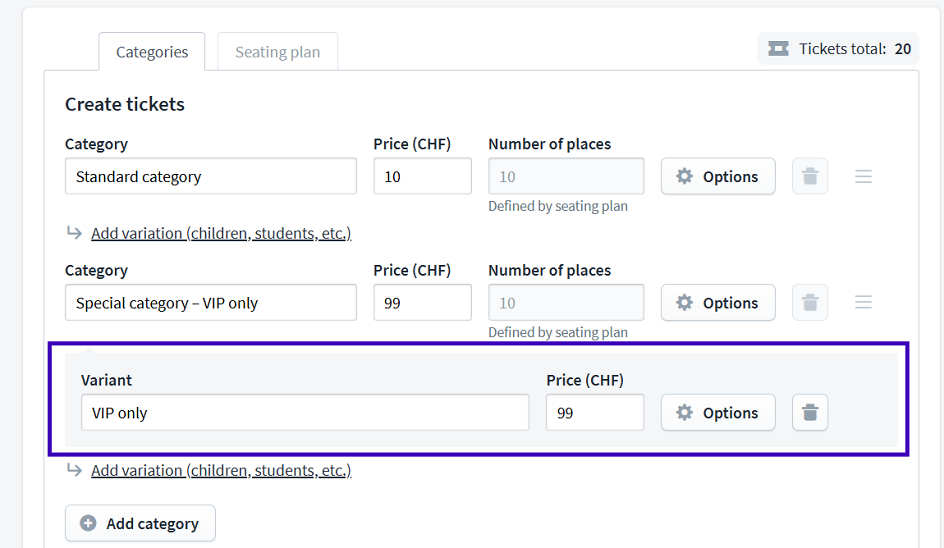
When using a seating plan, it is not possible to protect entire categories directly.. Instead, you can use subcategories:
- In the cockpit, go to «Tickets & Seating Plan» → «Ticket categories, seating plan» and click on «Edit categories».
- Add a variant/subcategory.
- Click on «Options» for the variant.
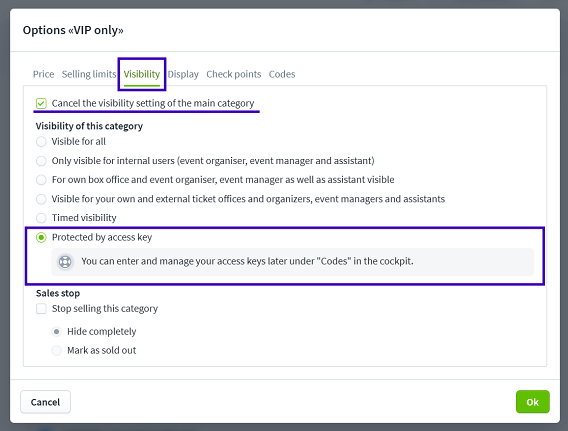
4. Activate the checkbox «Cancel the visibility setting of the main category».
5. The option «Protected by access key» will now appear – activate it and save.
Ticket buyers will only see the subcategory once they have entered the access key.
Apply access keys to already existing categories
Even after your event has been published, you can still protect categories using an access key:
- In your event, go to «Categoris, seating plan» → «Edit categories».
- For the desired category, go to «Options» → «Visibility» and change the setting to «Protected by access key».
- Save.
Important: If an event is upgraded from Free to Plus, the fees will also apply retroactively to tickets already sold.
Adding access keys
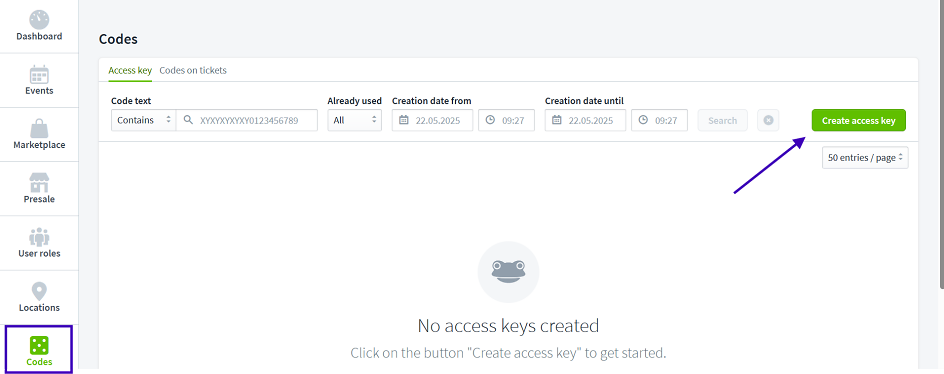
- Navigate to «Codes» and open «Access keys».
- Click on «Create access key».
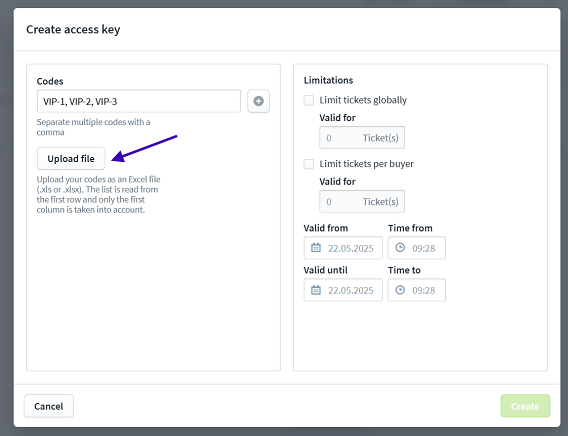
- Enter the access keys individually or upload them as a list.
Creating or uploading access keys
- Individual codes: Separate with commas and spaces.
- Excel upload: Only the first column will be read.
- Codes must be between 4 and 20 characters.
- Allowed characters: letters, numbers and hyphens (e.g. EF-12345, VIP-4567).
- Each access key must be unique.
Tip: For better clarity, use consistent naming patterns (e.g. EF-0001, EF-0002…).
Limit access key usage
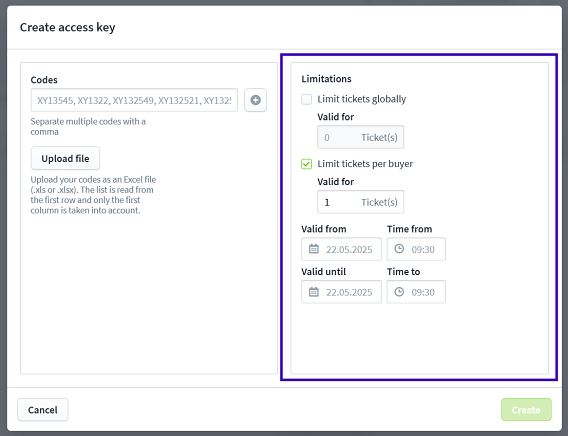
When creating access keys, you can:
- Set the total number of tickets available per key.
- Define the maximum number of tickets per buyer.
This gives you full control over how many tickets each person can purchase using the access key.
Assigning access keys
After creating your access keys:
1. In the «Codes» menu, select the desired access key.
2. Click on «Assign».
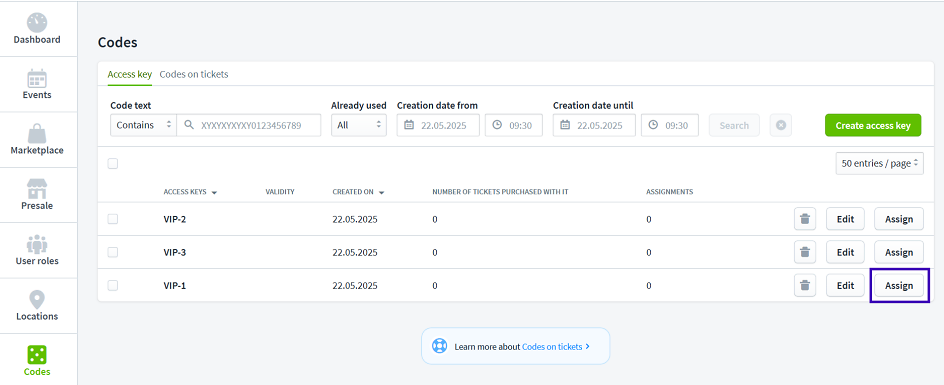
3. Select the relevant event and then choose the protected categories.
4. Save.
Only categories with access key protection enabled will be displayed here.
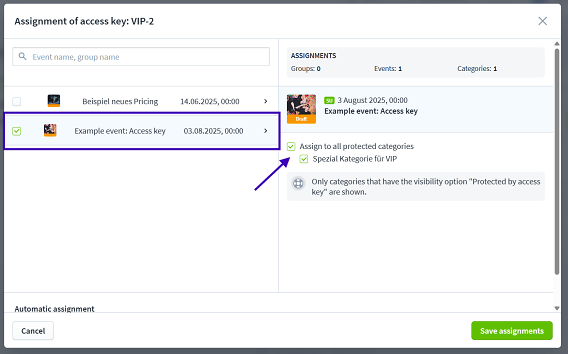
Automatic assignment of access keys
In the «Assign access key» window, you'll find two helpful options at the bottom for automating the assignment:
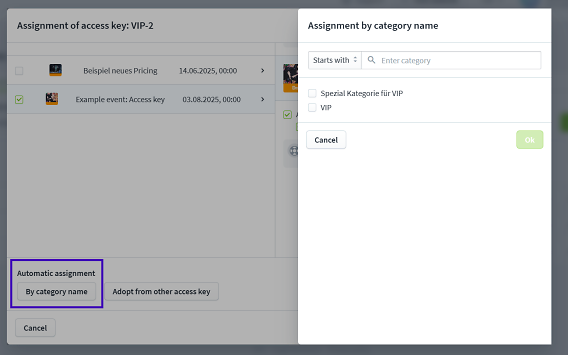
By category name
This option automatically assigns access keys to categories with names that exactly match the name of an already assigned key.
- Manually selected categories will remain unchanged.
- Automatically found matches will be added additionally.
- No existing assignments will be overwritten or removed.
Tip: This method works especially well if you use the same category names across multiple events (e.g. VIP, Early Bird, etc.).
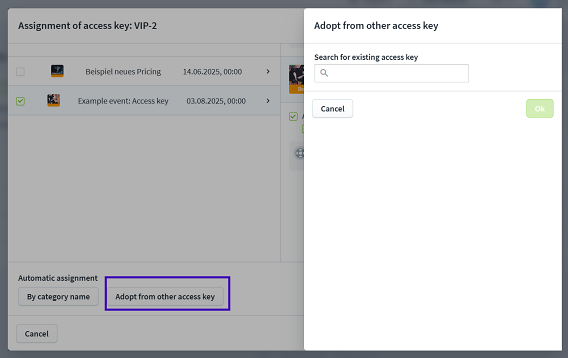
Adopt assignments from another access key
This function allows you to fully adopt the category assignments of an existing access key.
Caution: Any categories and variants you've already selected will be overwritten!
- If you click «OK» in the next step, the assignments from the selected key will be applied and your current selections will be replaced.
- If you click «Cancel», nothing will change – your previously selected categories will remain.
Tip: Want to prepare one access key cleanly (e.g. VIP-Original) and use it as a template to quickly assign the same categories to other keys? Then this feature is exactly what you need.
Editing access keys
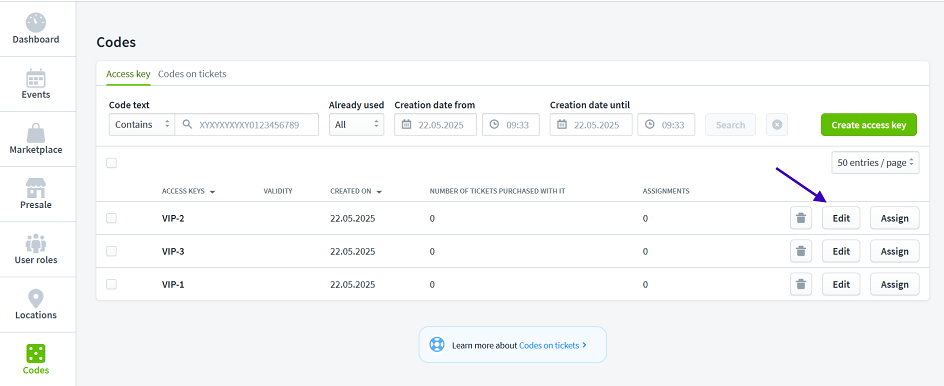
- Under «Codes», you can select and edit existing access keys.
- You can also edit multiple keys at once and adjust their usage limits.
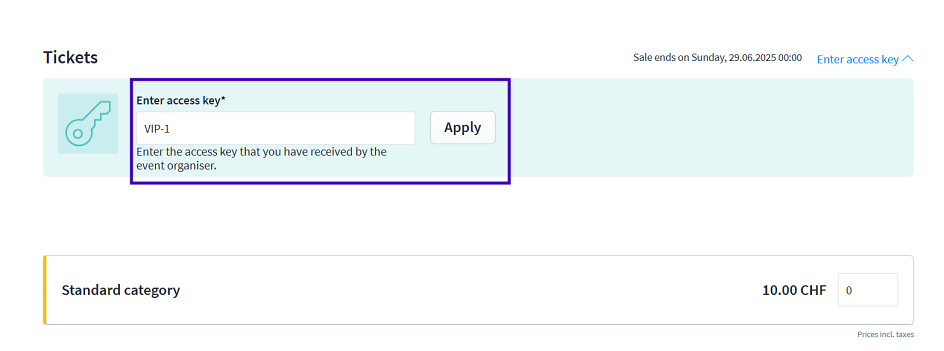
Display for ticket buyers
- Protected categories remain hidden until the correct access key is entered.
- Once the key is entered, only the assigned categories will be displayed.


Direct links to protected categories
If you'd like to direct specific groups – such as patrons – straight to a protected category, you can modify your event URL:
Show access code input field immediately:
https://eventfrog.ch/en/p/eventname+EventID.html?showCodeBox=1
Send access code directly (opens protected category):
https://eventfrog.ch/en/p/eventname+EventID.html?accessCode=YOURCODE
Show only protected category and hide all others:
https://eventfrog.ch/en/p/eventname+EventID.html?showAccesscodeCatsOnly=true&accessCode=YOURCODE
Note: Replace YOURCODE with the actual access key.


